To ascertain if your Anker power bank is charging, first check the LED indicator lights. Flashing LEDs signify active charging and reflect the current battery level. Press the power button for three seconds to view the battery status—illuminated LEDs indicate charge levels. Confirm the charging cable is securely connected to both the power bank and the wall adapter. Verify the wall adapter’s output matches the power bank’s input requirements. For accurate monitoring, regularly calibrate the device. Adhering to these steps guarantees efficient charging—exploring further technical details will enhance your understanding even more.
LED Indicator Lights
Typically, the LED indicator lights on your Anker power bank will show the current battery level and charging status. Understanding these LED colors is essential for efficient use. When you connect your power bank to a power source, the LED lights will illuminate to indicate the charging status.
Here’s a detailed breakdown: If the LEDs are flashing, it means your power bank is presently charging. The number of flashing LEDs corresponds to the battery’s current charge level. For example, if one LED is flashing, your battery is between 0-25% charged; two LEDs mean 26-50%, three LEDs mean 51-75%, and four LEDs mean 76-99%. Once all LEDs are solid, your power bank has reached 100% charge.
Anker power banks also use specific LED colors to signal different statuses. Typically, a blue or white LED indicates regular charging, while a red LED could indicate a fault or low battery condition. Always refer to your specific model’s manual for precise LED color codes. By understanding these signals, you make sure your power bank is always ready to deliver power, providing you with the freedom to keep your devices charged whenever and wherever you need.
Power Button Check
To initiate a power button check, press and hold the power button for at least three seconds. Observe the LED indicator lights to determine the current battery level. The number of illuminated LEDs will correspond to the remaining charge, providing a clear battery level display.
Press and Hold
Verify the power bank is turned on by pressing and holding the power button for three seconds until the LED indicators light up. This step confirms the device is powered up and ready to provide accurate feedback on its charging status. When the LEDs illuminate, it indicates that the power bank is active and capable of monitoring power bank connectivity and the current charging status.
To ascertain the charging status, confirm your power bank is connected to a power source using an appropriate cable. Once connected, the LEDs will indicate whether the device is receiving power. If the LEDs are static or follow a specific blinking pattern, it means the power bank is effectively charging.
Don’t overlook the importance of verifying power bank connectivity. Securely attach the charging cable to both the power source and the power bank. A loose connection can prevent proper charging and disrupt the feedback provided by the LEDs. The precision of this step is vital for those who prioritize flexibility and reliability in their portable power solutions.
Indicator Light Behavior
The indicator light behavior on your Anker power bank provides important diagnostics on its operational status and charging condition when you press the power button. When you tap the power button, observe the LED indicators. Each lit LED represents a segment of the charging progress. A fully lit series of indicators signifies a fully charged power bank.
If the LEDs flash, it indicates active charging. For instance, if only two out of four LEDs flash, it suggests the power bank is at 50% capacity and still charging. Flashing LEDs provide real-time updates on the charging speed and current capacity.
For troubleshooting tips, if the LEDs don’t light up upon pressing the button, check the connection and optimize the power source is functional. If the problem persists, a reset or battery life calibration may be necessary. Hold the power button for a few seconds to reset the device.
Pay attention to irregular flashing patterns, which might indicate a fault. Regular calibration—fully draining and then fully charging your power bank—ensures accurate LED readings and best battery performance. Use these indicators to maintain your power bank’s longevity and efficiency.
Battery Level Display
Pressing the power button on your Anker power bank triggers the battery level display, where each illuminated LED represents a specific percentage of remaining charge. To assess the charging progress, observe the number of LEDs illuminated:
- One LED (0-25% charge): Your power bank has minimal power. Connect it to a dependable power source immediately to prevent depletion.
- Two LEDs (26-50% charge): The battery is partially charged. While it can still power small devices, recharging to full capacity is recommended.
- Three LEDs (51-75% charge): Your power bank is more than halfway charged. This level indicates a good balance between usage and available power.
- Four LEDs (76-100% charge): The power bank is almost or fully charged, offering maximum portability and usage time.
To ensure precise reading, press the power button only once. If the LEDs flash, your power bank is actively charging, confirming that the charging progress is in progress. When all LEDs are stable, the device has reached full capacity.
Regularly checking the power button’s LED display enables you to manage your power source effectively, guaranteeing your Anker power bank is always prepared for use. This simple step gives you the flexibility to remain powered up, wherever your adventures take you.
Device Charging Confirmation
Verify the device displays a charging icon to confirm it’s receiving power from the Anker power bank. Upon connecting your device, immediately search for the charging notification. This icon typically appears on the device’s status bar or screen, indicating that the charging status is active. Modern devices often have a dedicated charging indicator; for example, smartphones will show a lightning bolt or battery icon with an animated fill.
Check the device settings menu for a detailed charging status. Navigate to the battery settings where you can see the exact percentage of charge being delivered. Some devices offer additional insights such as the estimated time until full charge. This level of detail assures you know the connection is stable and effective.
Validate the Anker power bank itself is functioning correctly by observing its LED indicators. These LEDs provide a real-time charging status of the power bank, confirming that it is discharging power to your device. If issues arise, reset the connection by unplugging and reconnecting the cable. This methodical approach guarantees that your device and Anker power bank are operating seamlessly, giving you the peace of mind to focus on what truly matters.
Charging Cable Inspection
Securing peak charging performance necessitates a thorough inspection of the charging cable to identify any signs of wear or damage that might hinder power delivery. Begin by confirming cable compatibility with your Anker power bank. Check that the cable supports the required voltage output to maintain top charging speed. Inspect the connectors for any bent pins or signs of corrosion, which can disrupt the electrical connection.
Next, focus on port cleanliness. Dust and debris can build up in the cable’s connectors, leading to poor contact and decreasing charging efficiency. Use a can of compressed air to gently clean the ports.
Follow these steps for a comprehensive inspection:
- Check for Physical Damage: Examine the cable for any visible cuts, frays, or exposed wires. These can notably impact charging performance and pose safety risks.
- Test Port Stability: Insert the cable into the power bank and your device to ensure it fits securely without wobbling. Loose connections can cause inconsistent power delivery.
- Measure Voltage Output: Use a multimeter to check the cable‘s voltage output, making sure it aligns with the specifications of your Anker power bank.
- Evaluate Charging Speed: Monitor the device’s charging rate. If it’s slower than anticipated, the cable might be the issue.
Wall Adapter Verification
To validate the wall adapter’s effectiveness, start by examining the adapter’s output specifications to confirm they align with the voltage and current requirements of your Anker power bank. Locate the adapter’s label and check the output, typically indicated in volts (V) and amperes (A). Confirm that these values match the input specifications of your power bank, as mismatched values can impede charging performance or harm the device.
Next, check outlet compatibility. Verify that the adapter fits securely into your wall outlet and establishes a stable connection. A loose or incompatible outlet can disrupt power delivery, negatively affecting charging speed and efficiency. If you’re traveling, ensure that your adapter is compatible with local outlets or use an appropriate converter to maintain optimal charging performance.
Lastly, verify the adapter’s charging speed capabilities. Some wall adapters support fast charging technologies, such as Power Delivery (PD) or Quick Charge (QC). These can significantly reduce charging times if your power bank is compatible. Compare the adapter’s specifications with the power bank’s requirements to determine if you can utilize these advanced features. Confirming that your wall adapter meets these criteria will ensure efficient, reliable charging for your Anker power bank.
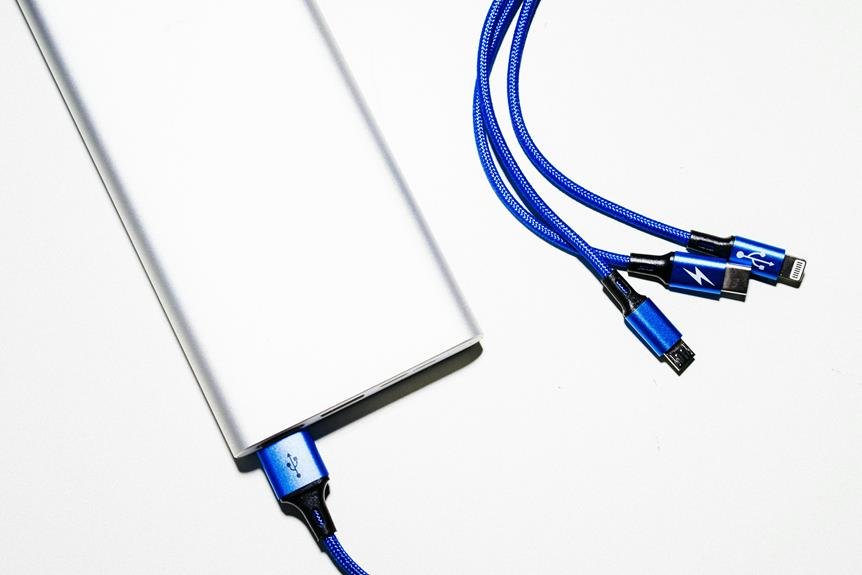
USB Port Check
After confirming your wall adapter, it’s crucial to examine the USB port on both the adapter and the power bank to verify they can handle the necessary power output and data transfer rates. This is vital for efficient charging and top-notch performance.
First, check the compatibility of the charging port. Ensure that the USB port types (e.g., USB-A, USB-C) on your adapter and power bank are a match. Using ports that do not align can lower charging efficiency or halt charging completely.
Second, conduct a voltage output assessment. Utilize a multimeter to measure the voltage output of the USB port on the wall adapter. The standard output should be 5V; any deviations may indicate issues.
Third, assess the physical state of the USB ports. Look for any indications of damage, such as bent pins or debris, which can hinder connectivity and, subsequently, charging capability.
Fourth, opt for a high-quality USB cable. Inferior cables can result in ineffective power transfer and delay the charging process. Ensure that your cable meets the required data transfer rates and power output.
“`markdown
- Verify charging port compatibility.
- Conduct voltage output assessment.
- Evaluate the physical state of USB ports.
- Select a high-quality USB cable.
“`
Battery Level Indicators
Battery level indicators, often integrated as LED lights or digital displays, are essential for monitoring your Anker power bank’s charge status and ensuring best usage. These indicators provide real-time feedback on the remaining battery capacity and the charging status, allowing you to gauge when it’s time to recharge or disconnect from the power source.
When you connect your power bank to a power source, observe the LED lights or digital readout. Typically, the LEDs will blink sequentially to indicate the ongoing charging process. For instance, if your Anker power bank has four LED indicators, one blinking LED suggests it’s charging from 0-25%, two blinking LEDs indicate 25-50%, and so forth. A solid LED display means that particular segment is fully charged. Digital displays offer a more granular view, often showing percentages, making it easier to ascertain the precise charging status.
To maximize efficiency, make sure the power bank is connected to a compatible power source, like a wall adapter with the appropriate voltage and current ratings. Utilization of the correct power source ensures optimal charging speed and prolongs the lifespan of your device. Always disconnect the power bank once fully charged to maintain battery health.
Charging Time Estimation
By understanding the battery level indicators, you can more accurately estimate the charging time required for your Anker power bank based on its current charge status and the power source specifications. Here’s how you do it efficiently.
- Identify Charging Progress: Observe the LED indicators on your power bank. Each LED typically represents 25% charge. If three LEDs are on, you’re at approximately 75%.
- Calculate Time Remaining: Check the power source’s output (e.g., 5V/2A). Divide the remaining capacity by the input rate. For example, if you have 25% left in a 10,000mAh power bank, you need to charge 2,500mAh. With a 2A charger, that’s around 1.25 hours.
- Use Manufacturer’s Data: Anker provides estimated charging times based on different power sources. Refer to the user manual or Anker’s official website for this data.
- Consider Charging Efficiency: Not all the input power converts directly to stored energy due to inefficiencies. Typically, expect about 90% efficiency. Adjust your calculations accordingly.
Frequently Asked Questions
Can I Use My Anker Power Bank While It’s Charging?
Yes, using your power bank while it’s charging is possible, but it’s not recommended. For best charging safety, avoid simultaneous usage. This practice can lead to overheating, reduced efficiency, and potential battery lifespan reduction.
Will Charging in Extreme Temperatures Impact My Power Bank’s Performance?
Did you know extreme temperatures can reduce battery lifespan by up to 50%? Charging in such conditions affects your Anker power bank’s charging speed and efficiency, so keep it within the recommended temperature range for peak performance.
How Long Can I Store My Power Bank Without Using It?
You can store your power bank for up to six months without significant impact on its lifespan. Maintain ideal storage conditions by keeping it at 40-60% charge and in a cool, dry place to preserve performance.
Does My Anker Power Bank Support Fast Charging?
Imagine a lightning bolt in your pocket—your Anker power bank’s charging indicator reflects battery compatibility. Check the specs: charging speed and power output. Guarantee your device supports these features for best fast charging efficiency and freedom.
What Should I Do if My Power Bank Gets Wet?
If your power bank gets wet, immediately disconnect it and avoid using it. Initiate drying methods like silica gel. Consult Anker’s warranty coverage for potential repair options. Troubleshooting moisture damage may require professional assistance to guarantee safety.
References
- https://www.wikihow.com/Charge-a-Power-Bank
- https://www.lifewire.com/how-to-use-a-portable-charger-5110761
- https://www.aarp.org/home-family/personal-technology/info-2020/power-bank-tips.html
- https://www.consumerreports.org/power-banks/how-to-choose-a-portable-charger/
- https://www.bbc.com/future/article/20210104-how-to-charge-your-phone-and-keep-it-healthy
- https://www.sciencedirect.com/topics/engineering/power-bank
- https://www.nytimes.com/wirecutter/blog/portable-phone-chargers/