To determine if your Anker power bank is charging, observe the LED indicators. Sequential lighting typically signifies charging progress. Confirm the power cable is secure and free from damage, and verify the compatibility of the power source—using a certified Anker wall charger is advisable. Monitoring the battery percentage will show incremental increases if charging is effective. If LED indicators don’t behave as anticipated, inspect for issues like debris, oxidation in connectors, or faults in the charging port. Evaluating these aspects will provide a clear indication of the charging status. For a thorough troubleshooting approach, continue exploring.
Check LED Indicators
One of the primary methods to determine if your Anker power bank is charging is by observing the LED indicators. These LEDs provide important real-time feedback about the charging status. Typically, Anker power banks have a series of LEDs that light up sequentially to indicate charging progress. When you connect the power bank to a power source, you should see one or more LEDs blinking, signifying that the device is actively charging.
If you encounter issues where the LEDs aren’t lighting up, you should consider some troubleshooting tips. First, make sure that the power source and the cable are functional. A faulty USB cable can often be the culprit, so swap it out as a part of your troubleshooting techniques. Additionally, verify that the power bank’s input port is clean and undamaged, as debris or damage can impede charging.
When troubleshooting common issues, it’s crucial to remember that sometimes the power bank might need a reset. Refer to the user manual for specific instructions on how to perform a reset. By applying these troubleshooting solutions, you can effectively diagnose and resolve most LED indicator-related charging issues, guaranteeing your power bank’s operational readiness.
Connect to a Device
To validate your Anker power bank is charging correctly, first connect it to a device using a compatible cable. Check the power indicators on both the power bank and the device to ascertain proper current flow. Additionally, monitor the device’s battery percentage to verify it increases as expected.
Check Power Indicators
When verifying whether your Anker power bank is charging, it is essential to examine the power indicators while the device is connected. The power indicators provide a visual representation of the charging status and battery level. Typically, these indicators are LED lights that illuminate in various patterns to signify different states.
First, observe the LED lights on your power bank. If the LEDs are blinking in a sequential manner, this generally indicates that the power bank is actively charging. The number of illuminated LEDs corresponds to the current battery level. For instance, if two out of four LEDs are lit, the battery level is approximately 50%.
Furthermore, a steady illumination of all LEDs usually signifies that the power bank is fully charged. Conversely, if none of the LEDs are illuminated, it may indicate that the power bank is either not charging or fully depleted. This nuanced feedback mechanism allows you to gauge the charging status without needing additional tools or software.
Confirm Cable Connection
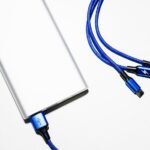
Verifying a secure cable connection is crucial for confirming the charging status of your Anker power bank. Begin by examining the cable condition, as a frayed or damaged cable can hinder the charging process. Inspect both ends of the cable; any visible wear or exposed wires suggest it’s time for a replacement.
Next, connect the cable securely to the power source. Whether it’s a wall adapter, USB port on your computer, or a car charger, make sure the connection is firm. A loose connection can result in intermittent charging, leading to inaccurate assessments of your power bank’s status.
Once the cable is connected to a reliable power source, attach the other end to your Anker power bank. Listen for the distinctive “click” that indicates a secure fit. For USB-C connections, make sure the cable is fully inserted, as partial connections can mimic charging issues.
Additionally, verify the power source itself. Confirm it’s operational and compatible with your power bank’s voltage requirements. Inconsistent or inadequate power sources can cause charging irregularities, hampering your efforts to confirm the power bank’s charging status. Reliable connections and proper cable condition are critical for accurate verification.
Monitor Device Battery
Connecting your Anker power bank to a device is an effective method for monitoring its battery status in real-time. By linking it to your smartphone or tablet, you can observe the battery level and charging status directly. This approach provides immediate feedback, making sure you understand the power bank’s current operating condition. Here’s how to proceed:
- Connect the Device: Utilize a compatible cable to link your Anker power bank to your device. Confirm the connection is secure to avoid intermittent power supply issues.
- Check Charging Indicators: Most devices display a charging icon when connected to a power source. Observe this icon to verify that the power bank is actively charging the device, thereby indicating it has sufficient charge.
- Monitor Battery Level: Access your device’s settings to view the battery level. An increasing percentage indicates that the power bank is functioning correctly and delivering power.
- Evaluate Charging Status: Some devices offer detailed charging status, including the rate of charge. This can assist you in determining whether the power bank is fully operational or if there are efficiency issues.
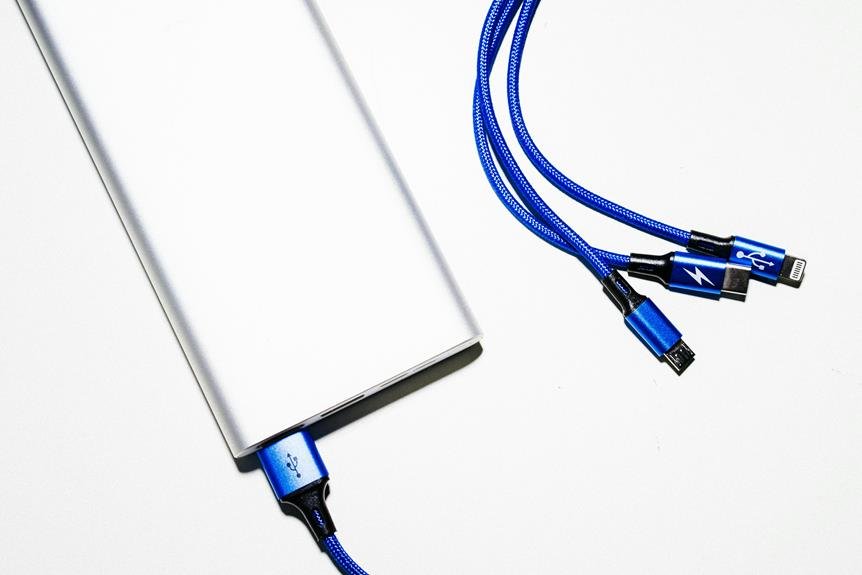
Inspect the Power Cable
Examine the integrity of the power cable for any signs of fraying, bends, or exposed wires that could hinder proper charging functionality. When you inspect cable quality, pay close attention to the connectors at both ends. Verify that the USB-A and USB-C or Micro USB connectors are free of debris, oxidation, or any visible damage. A compromised connector can cause intermittent charging or complete failure to charge your Anker power bank.
To troubleshoot connection issues, gently flex the cable at various points along its length. Listen for any crackling sounds or observe if the power bank’s LED indicators flicker, which would indicate internal wire damage. Utilize a multimeter to check the conductivity of the cable if you’re technically inclined. This device can help you pinpoint any breaks in the circuit that aren’t visible to the naked eye.
Lastly, use a known-good cable to determine if the issue lies with the power bank itself or the cable in question. Swapping out the cable can quickly isolate the problem, allowing you to maintain the freedom to keep your devices charged and ready for use.
Use a Wall Charger
When using a wall charger, you should check the LED indicators on your Anker power bank to confirm it’s receiving power. Assess the charging speed by noting the time taken to reach a full charge compared to the specifications. Additionally, make sure that all connections are secure to avoid intermittent charging issues.
Verify LED Indicators
To determine if your Anker power bank is charging, observe the LED indicators while using a wall charger as this provides a reliable power source and stable current flow. The LED indicators are vital for understanding the charging status and battery level of your power bank. Here’s a detailed analysis of what each indicator typically means:
- Blinking LEDs: When the LEDs blink, it signifies that the power bank is actively charging. The number of blinking LEDs may increase as the battery level rises.
- Solid LEDs: If the LEDs remain solid, it indicates that the power bank has reached that specific battery level. For example, if three out of four LEDs are solid, it means the power bank is 75% charged.
- LED Pattern: Some models feature a specific LED pattern or sequence to denote charging status. Consult your user manual to understand your particular model’s LED behavior.
- Single Blinking LED: If only one LED is blinking while the others are off, the power bank might be at a very low battery level, but it’s still in the process of charging.
Check Charging Speed
Although you might rely on various charging methods, using a wall charger can guarantee maximum charging speed for your Anker power bank, providing a stable and consistent power supply. Wall chargers typically offer higher amperage compared to USB ports on computers or car chargers, enhancing charging efficiency. To assess whether your power bank is charging efficiently, consider conducting a speed test.
First, connect your Anker power bank to a wall charger with the appropriate voltage and amperage ratings. Use a USB power meter to measure the current flow (in amperes) and voltage (in volts). This data will help you determine if the power bank is receiving the correct input for effective charging.
In case the speed test reveals less than ideal performance, engage in troubleshooting steps by verifying the wall charger’s specifications and ensuring it’s compatible with your Anker power bank. Additionally, inspect the charging cable for any signs of wear or damage that could impede charging efficiency.
Ensure Proper Connection
Properly connecting your Anker power bank to a wall charger is essential to ensuring best charging performance and avoiding potential damage to the device. First, you must confirm the appropriate power source is being used. Anker power banks typically require a wall charger with an output of at least 5V/2A for prime charging efficiency. Utilizing a subpar charger might not provide sufficient current, leading to slower charge times or even failure to charge.
To troubleshoot connection issues and confirm proper power source, follow these steps:
- Inspect the Charging Cable: Verify that the cable is free from damage and securely connected to both the power bank and the wall charger.
- Check the Wall Outlet: Confirm the wall outlet is functioning correctly by testing it with another device. A faulty outlet can impede the charging process.
- Examine the Wall Charger: Use a certified Anker wall charger to ensure compatibility. Non-certified chargers might not deliver the necessary power output.
- Monitor LED Indicators: Most Anker power banks have LED lights that signal charging status. If the LEDs don’t light up, reassess the connections and try a different charger.
Monitor Charging Time
Keeping an eye on the charging time of your Anker power bank is essential for maximizing its efficiency and not experiencing any potential issues. Monitoring the charging progress can help you gauge the health of the battery life and maintain peak performance. Start by noting the estimated charging time provided in the user manual. Typically, an Anker power bank should take a few hours to fully charge, depending on its capacity and the charger used.
To monitor charging time, you should observe the LED indicators on the power bank. These indicators usually provide real-time feedback on the charging progress. If the LEDs aren’t lighting up sequentially or seem to be stuck, it might indicate a problem with the charging circuit or the power source. Additionally, using a timer or stopwatch can help you track the actual time taken to reach a full charge versus the manufacturer’s specifications.
If you notice a significant deviation from the expected charging time, it could imply potential issues with the battery life or the effectiveness of the charger. Regularly recording and comparing these times can help you identify anomalies early, maximizing your Anker power bank remains in peak condition.
Test With Different Devices
Testing your Anker power bank with various devices can provide essential insights into its charging efficiency and compatibility. Different devices have unique power requirements, and understanding how your power bank performs with each can help you maximize its utility.
- Smartphones: Connect a smartphone to your power bank and observe the charging speed. Smartphones typically require less power, making it a good initial test for charging compatibility and power bank capacity.
- Tablets: These require more power than smartphones. Testing with a tablet will help you evaluate the power bank’s capacity to handle higher power demands and its ability to maintain efficient charging speeds.
- Laptops: For power banks that support laptop charging, this test is vital. Laptops demand significantly more power, challenging the power bank’s capacity and efficiency. This test will reveal any limitations in device compatibility.
- Wearables: Although these devices consume minimal power, testing with wearables can help you assess how the power bank handles very low power outputs and the overall versatility in charging devices with varying power requirements.
Observe Battery Percentage
How can you determine if your Anker power bank is effectively charging by monitoring the battery percentage? To assess the charging behavior, closely observe the battery level indicators on your power bank’s display. When connected to a power source, the battery percentage should incrementally increase over time. A stagnant or decreasing battery level may indicate a malfunction or improper connection.
Start by ensuring the charging cable and adapter are functioning correctly. Once connected, the LED display or digital screen should show an ascending battery percentage. For example, if the battery level reads 45%, it should progressively rise to 46%, 47%, and so on, confirming effective charging behavior.
Monitor the rate of change in the battery level. Anker power banks typically have efficient charging circuits, so the percentage should increase at a steady pace. If the battery level remains constant or fluctuates wildly, it could imply an issue with the power bank or the charging setup.
Examine the Power Button
To determine if your Anker power bank is charging properly, press the power button and observe the response of the LED indicators. The power button plays a pivotal role in diagnosing the charging status and overall functionality of your device.
When you press the power button, several outcomes can indicate whether your power bank is charging or requires troubleshooting:
- Steady LED Lights: If the LED lights remain steady, it suggests that the power bank is actively charging and the internal battery is receiving power.
- Flashing LED Lights: Flashing LEDs typically indicate the power bank is in the process of charging. The number of flashing lights corresponds to the current battery level.
- No LED Response: An absence of any LED response upon pressing the power button may signal a fault in the power button functionality or an issue with the internal battery.
- Erratic LED Behavior: Sporadic or unusual LED patterns could point to a malfunction requiring immediate troubleshooting.
Look for Faulty Ports
After checking the LED indicators via the power button, it’s crucial to inspect the charging ports for any signs of damage or irregular function. A thorough examination of the input and output ports can reveal potential issues hindering your Anker power bank’s charging efficiency. Start by looking for any visible debris or corrosion within the ports. Such obstructions can disrupt the connection between the power bank and the charging cable.
Next, troubleshoot cables by testing with different USB cables and adapters. Sometimes, the issue might not be with the power bank itself but with the cables or adapters you’re using. Make sure that the cables are not frayed, bent, or otherwise damaged, as these can directly impact the charging process.
Also, consider using a multimeter to measure the voltage output from the power bank’s ports. This will provide a quantitative assessment of the port’s functionality. If the voltage readings are inconsistent or lower than expected, the port might be faulty and require professional repair or replacement. By thoroughly inspecting ports and troubleshooting cables, you can effectively identify and mitigate issues that prevent your Anker power bank from charging at its best.
Frequently Asked Questions
Can I Charge My Anker Power Bank via a Solar Panel?
Yes, you can charge your Anker power bank via a solar panel. Solar charging benefits include portability and eco-friendliness. Confirm compatibility between the solar panel’s output and the Anker power bank’s input requirements for peak charging efficiency.
How Long Does It Take to Fully Charge an Anker Power Bank?
Charging time depends on your specific model’s charging speed and power bank efficiency. Generally, it takes 6-12 hours. Check your charging indicators for accurate status. Effective charging guarantees peak battery life and faster readiness for use.
Is It Safe to Use Third-Party Cables With My Anker Power Bank?
It’s important to take into account cable compatibility when using third-party cables with your Anker power bank. Safety concerns, charging efficiency, and durability factors can be compromised. Always verify third-party cables meet specifications for best performance and safety.
What Should I Do if My Anker Power Bank Gets Hot While Charging?
Imagine your power bank feeling like a warm stone. For power bank safety, immediately disconnect it to prevent overheating. Charging precautions include placing it in a cool area and regularly temperature monitoring to make sure it doesn’t get too hot.
How Can I Tell if My Anker Power Bank Is Overcharging?
To determine if your Anker power bank is overcharging, monitor the charging indicators. Continuous or erratic lights can signal issues. Overcharging can negatively impact battery lifespan, so ensure proper usage and regular checks for peak performance.
References
- https://www.wikihow.com/Charge-a-Power-Bank
- https://www.lifewire.com/how-to-use-a-portable-charger-4768393
- https://www.techradar.com/how-to/how-to-use-a-power-bank
- https://www.consumerreports.org/power-banks/how-to-choose-a-power-bank-a9736213768/
- https://www.energystar.gov/products/energy_star_power_banks
- https://www.batteryuniversity.com/learn/article/how_to_charge_a_battery