To turn on your Anker power bank, start by locating the power button, usually found on the side or front of the device. Press and hold the button for a few seconds until the LED indicators light up, showing it’s powered on. The LED lights also display the battery level. If the power bank doesn’t turn on, it might need to be charged first. Connect your device using the appropriate cable, ensuring compatibility. Once connected, your device should start charging. You’re all set to explore more features and optimize your power bank usage!
Unbox Your Anker Power Bank
Ever wondered how to unbox your Anker Power Bank efficiently? Let’s dive right in. First, grab the box and find a flat surface. Carefully peel off any seals. Open the box and you’ll find the power bank, a user manual, and usually a USB cable. The power bank design is sleek and compact, making it one of the best portable charging solutions out there.
Take a moment to appreciate the power bank features. You’ll notice multiple USB ports, an LED indicator, and a power button. These features are essential for the charging process, letting you charge multiple devices simultaneously and keep track of your power levels.
With the power bank in hand, examine its design. It’s built for portability, ensuring you can carry it in your bag or pocket effortlessly. The lightweight and robust construction means it’s ready to go wherever you are, providing reliable power whenever you need it.
Now, connect the provided USB cable to start charging the power bank itself. You’re almost ready to enjoy the freedom of portable charging solutions. Unboxing done right sets you up for a hassle-free experience.
Check the Battery Level
To check the battery level on your Anker Power Bank, simply press the power button and observe the LED indicators. These small lights will give you a clear indication of your battery’s current status. Understanding these indicators can help you manage your charging progress and make sure you’re always prepared with a reliable power source.
Here’s a quick guide to interpreting the LED indicators:
| LED Indicators | Battery Level |
|---|---|
| 1 Solid Light | 0-25% |
| 2 Solid Lights | 26-50% |
| 3 Solid Lights | 51-75% |
| 4 Solid Lights | 76-100% |
Keeping an eye on these indicators is important for maintaining battery health. If you notice the battery level dropping quickly, it might be time to adjust your charging habits or check the power source. Using the right adapter can also improve charging speed and help prolong the life of your power bank.
Locate the Power Button
After checking the battery level, the next step is to locate the power button on your Anker Power Bank. The power button is usually a small, easily identifiable button found on the side or top of the device, depending on the model you have. It’s often slightly recessed or raised, making it easy to feel even in low light conditions. This button is an essential feature, not only for turning on the power bank but also for checking the remaining battery level and, in some models, activating additional functionalities.
Take a moment to familiarize yourself with the power button’s features. Some Anker Power Banks might have an LED indicator integrated within or around the button, which lights up when pressed. This serves as a visual confirmation that the device is active. The power button is designed to be intuitive, so you won’t struggle to find or use it.
Press and Hold the Button
Once you’ve located the power button, press and hold it until the indicator lights turn on. These lights will show the power bank’s current charge level. If the lights don’t respond, check for any common issues like a drained battery or a faulty connection.
Button Location Explained
Located typically on the side or front of the Anker power bank, the button must be pressed and held to turn the device on. Understanding the button functionality is key to ensuring your power source is ready when you need it. You’ll find the button easily accessible, designed for quick activation without fuss.
When you locate the button, here’s what you might see:
- A small, round button nestled into the sleek design of the power bank.
- A slightly raised surface making it easy to identify by touch.
- A tactile click that confirms you’ve pressed it correctly.
- A subtle but firm hold ensuring it doesn’t turn on accidentally in your bag.
To activate the Anker power bank, simply press and hold the button for a few seconds. This action signals the internal mechanisms to draw energy from the power source and begin charging your devices. Whether you’re on a hike, at a festival, or traveling, knowing how to quickly turn on your power bank gives you the freedom to stay connected. No more searching for outlets or worrying about dead batteries. Embrace the convenience and reliability Anker provides, and keep your devices powered up and ready to go.
Indicator Light Functions
By pressing and holding the button, you’ll notice the indicator lights illuminate, providing essential information about the power bank’s charge status. These lights act as your guide to understanding how much charge is left and when it’s time to connect to a power source. Here’s a breakdown of what the indicator lights mean:
| Number of Lights | Charging Status | Action Needed |
|---|---|---|
| 4 lights | 75% – 100% charged | No immediate action needed |
| 3 lights | 50% – 75% charged | Plan for next charge soon |
| 2 lights | 25% – 50% charged | Consider charging soon |
| 1 light | 0% – 25% charged | Connect to power source now |
When you see all four lights on, your power bank is fully charged and ready for extended use. Three lights indicate that it’s still in good shape, but it might be wise to keep an eye on it. Two lights mean you should plan to recharge soon, and just one light means you need to connect to a power source immediately.
Understanding these indicator lights allows you to manage your power bank efficiently, ensuring you’re never caught without a charge when you need it most. Use this knowledge to stay powered up and free to go about your day.
Troubleshooting Power Issues
To troubleshoot power issues with your Anker Power Bank, press and hold the button to reset the device. This simple action can resolve many common issues you might encounter. If your power bank isn’t charging or delivering power properly, a reset often clears the glitch.
Here are some troubleshooting tips to guide you:
- Check the Indicator Lights: Confirm the lights on your power bank are functioning as described in the user manual. This helps to understand if it’s charging or fully charged.
- Inspect the Cables: Sometimes, the issue lies with the charging cables. Make sure they’re not frayed or damaged.
- Test with Different Devices: Connect your power bank to various devices to see if it’s an issue with the power bank settings or the device itself.
- Refer to the User Manual: The manual often contains specific troubleshooting tips for your model, which can offer solutions tailored to your device.
Taking these steps can free you from the frustration of a malfunctioning power bank. By addressing these common issues and understanding your power bank’s settings, you can guarantee your Anker Power Bank operates smoothly, keeping you powered up and ready for adventure.
Verify Power Status
To confirm the power status of your Anker power bank, first check the LED indicators to see how much charge is left. Next, look at the battery percentage display if your model has one. Finally, press the power button to guarantee it’s functioning correctly.
Check LED Indicators
Most Anker power banks feature LED indicators that let you quickly check the current power status. These tiny lights provide essential information about the power capacity and charging status, ensuring you’re never caught off guard. Understanding what each LED light signifies will help you gauge how much juice you have left and whether your power bank needs recharging. Here’s what you typically see:
- Four LED lights: Your power bank is fully charged or almost there, indicating high power capacity.
- Three LED lights: You’ve got a good amount of charge left, around 75% capacity.
- Two LED lights: You’re running at about 50% power, so consider recharging soon.
- One LED light: You’re under 25% capacity—time for a recharge.
These indicators are usually activated by pressing the power button on the side of the device. Keeping an eye on these LED lights means you won’t be left powerless when you need it most. The design is meant to be intuitive, making it easy for you to verify the charging status at a glance. With this knowledge, you can manage your device’s power effectively, giving you the freedom to stay connected wherever you go.
Battery Percentage Display
While the LED indicators give you a quick visual cue, some Anker power banks come equipped with a digital battery percentage display for more precise power status updates. This feature provides you with an exact reading of your power bank’s remaining battery life, allowing you to plan your charging sessions more efficiently.
To check the battery percentage, simply press the power button on your Anker power bank. The digital display will light up, showing you the current battery level in percentage. This eliminates the guesswork often associated with LED indicators and gives you a clearer understanding of how much power is left.
If you’re concerned about device compatibility, rest assured that the digital display also acts as a charging indicator. When you connect your device, the display will show the power bank’s battery level and sometimes even indicate the charging status, letting you know that your device is charging correctly.
This feature is especially useful when you’re on the go and need to make sure your devices have enough power. With the digital battery percentage display, you’re in control, knowing exactly when to recharge your power bank and maintain your freedom intact.
Power Button Test
When you need to verify your Anker power bank’s power status, pressing the power button will quickly light up the LED indicators or digital display, providing an immediate update. The power button function is straightforward; a single press is usually enough to reveal the battery level. If the lights don’t come on, you might need to do a bit of troubleshooting.
To visualize this process, think of it like this:
- Press the button: A quick tap activates the LEDs or the display.
- Observe the lights: One to four LEDs or a digital readout will indicate how much charge is left.
- Troubleshoot if necessary: If nothing lights up, make sure the power bank is charged or try holding the button for a few seconds.
- Check connections: Ensure the power bank isn’t connected to a device that might interfere with the button activation.
Knowing the battery level gives you the freedom to plan your day without worrying about running out of power. The button activation is designed to be simple and intuitive, allowing you to quickly assess your power bank’s status and get back to your adventures. If you encounter issues, a little troubleshooting can often resolve the problem and get you back on track.
Connect Your Device
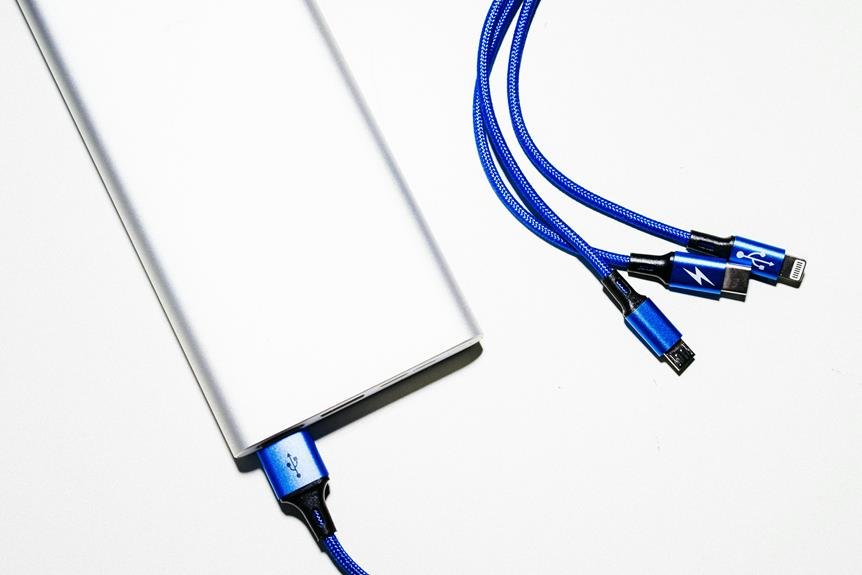
To connect your device, plug the appropriate charging cable into both your device and the Anker Power Bank. Ensuring proper connection is essential for efficient charging. Before you start, check the power bank compatibility with your device. Anker power banks typically support a variety of device types, from smartphones to tablets and even some laptops.
For best performance, follow some essential charging tips and safety precautions. Use only the cable that came with your device or a certified replacement. Avoid using damaged cables as they can lead to inefficient charging or even pose safety risks. Always keep an eye on the power bank’s LED indicators to make sure the device is charging correctly.
Next, consider the power needs of your specific device. Smaller gadgets like smartphones usually require less power than larger devices like tablets. Make sure the power bank’s output matches your device’s requirements to avoid any compatibility issues. Some Anker models come with multiple output ports, allowing you to charge more than one device simultaneously.
Freedom in using your Anker Power Bank means understanding these small but vital details. By following these guidelines, you optimize both your device and power bank remain in good condition, providing you with the reliable power you need, whenever you need it.
Frequently Asked Questions
How Long Does It Take to Fully Charge an Anker Power Bank?
Charging time depends on your Anker power bank’s battery capacity. Typically, with good power bank efficiency and charging speed, it takes around 4-6 hours. However, larger capacities might need up to 10 hours for a full charge.
Can I Charge Multiple Devices Simultaneously With an Anker Power Bank?
You can charge multiple devices simultaneously with an Anker Power Bank, but mind your charging etiquette to avoid compatibility issues. Don’t bite off more than you can handle; make sure your devices are compatible with the power bank’s output.
Is It Safe to Leave the Power Bank Charging Overnight?
Leaving your power bank charging overnight can impact battery lifespan and pose a fire hazard. It’s safer to unplug once fully charged. Ensuring best care extends the device’s life and mitigates potential risks.
How Do I Know When My Anker Power Bank Needs to Be Recharged?
When your Anker power bank’s indicator light blinks like a lighthouse in a storm, it’s signaling a low battery. You’ll need to recharge it soon to keep your devices powered and your adventures uninterrupted.
Can the Anker Power Bank Be Used While It Is Charging?
Yes, you can use your Anker power bank while it’s charging. This feature, known as pass-through charging, allows you to explore various charging options without interruption, providing the freedom to stay powered up anytime.
References
- https://www.lifewire.com/how-to-use-anker-power-bank-4776705
- https://www.pcgamer.com/how-to-charge-your-anker-power-bank/
- https://www.techradar.com/how-to/how-to-use-a-power-bank
- https://www.dailystar.co.uk/tech/news/use-power-bank-how-charge-17159289
- https://www.tomsguide.com/face-off/anker-vs-ravpower-power-bank
- https://www.wired.com/story/power-bank-buying-guide/